I. Lời nói đầu:
-
Gần đây các hệ thống áp dụng Dev/Ops đã dần trở nên phổ biến. Các thao tác test cơ bản như unit test, integration test đã được thực hiện một cách tự động hóa hoàn toàn.
-
Đối với từng ngôn ngữ khác nhau, chúng ta có các tool hay framework khác nhau để tự động hóa việc test này.
-
Và để kiểm soát cũng như biết được chất lượng của việc Automation Test, chúng ta không thể quên Code Coverage Report.
-
Vậy Code Coverage Report là gì? Và chúng ta sử dụng nó ra sao? Bài viết dưới đây sẽ miêu tả khái quát về một Code Coverage Report.
II. Code Coverage Report:
-
Code Coverage Report là một báo cáo tổng hợp độ bao phủ của việc test automation. Nó cho chúng ta biết được việc Automation Test đã được thực thi bao nhiêu % trong toàn bộ source code.
-
Một ví dụ đơn giản như dưới đây:
yarn run v1.22.4 $ jest --coverage -u PASS src/App.test.js App: √ snapshot renders (14 ms) PASS src/components/__test__/Sample.test.js (5.578 s) Sample: √ 1. Text in state is changed when button clicked (10 ms) ----------------|---------|----------|---------|---------|------------------- File | % Stmts | % Branch | % Funcs | % Lines | Uncovered Line #s ----------------|---------|----------|---------|---------|------------------- All files | 83.33 | 100 | 60 | 83.33 | src | 80 | 100 | 50 | 80 | App.js | 80 | 100 | 50 | 80 | 8 src/components | 85.71 | 100 | 66.67 | 85.71 | Sample.js | 85.71 | 100 | 66.67 | 85.71 | 9 ----------------|---------|----------|---------|---------|------------------- Test Suites: 2 passed, 2 total Tests: 2 passed, 2 total Snapshots: 1 passed, 1 total Time: 7.283 s, estimated 10 s Ran all test suites. Done in 8.54s. -
Các bạn dễ dàng thấy rằng mặc dù test case không có lỗi xảy ra nhưng độ bao phủ của Automation Test chỉ đạt được 66,67%.
-
Các thuộc tính của một Coverage Report:
- File: Đối tượng file test.
- Stmts (Statement coverage): Tỷ lệ bao phủ xem mỗi lệnh trong chương trình có được thực hiện hay không (tỷ lệ bao phủ lệnh).
- Branch (Branch coverage): Tỷ lệ bao phủ về việc liệu tất cả các xử lý nhánh như if ... else hay case ... of có được thực hiện hay không.
- Funcs: (Function coverage): Tỷ lệ bao phủ của việc mỗi chức năng trong chương trình được gọi.
- Lines: Tỷ lệ bao phủ của mỗi dòng code của tệp nguồn có được thực thi hay không
- Uncoverd Line: Những dòng code chưa được thực thi unit-test.
- Test Suites: Kết qủa test của từng file.
- Tests: Kết quả của mỗi test case.
- Snapshots: Số bản Snapshot đã tạo ra.
- Time: Thời gian chạy test.
-
Dựa trên Code Coverage Report chúng ta có thể dự đoán được chất lượng của việc Automation Test.
-
Có một lưu ý mặc dù 100% test cũng như 100% test pass không có nghĩa hệ thống OK 100%.
-
Một số Coverage Report thường gặp:
- JaCoCo XML
- SimpleCov JSON
- Clover XML
- Cobertura XML
Trong phạm vi bài viết này mình sẽ sử dụng:
- Coverage report format: Clover XML
- Frontend Framework: ReactJS
- Automation test tool: Jest và Enzyme
III. Tiến hành:
1. Chuẩn bị trước môi trường trên máy local:
- NodeJS v12.18.3
2. Tạo React App với NPX
npx create-react-app react-app-with-unit-test
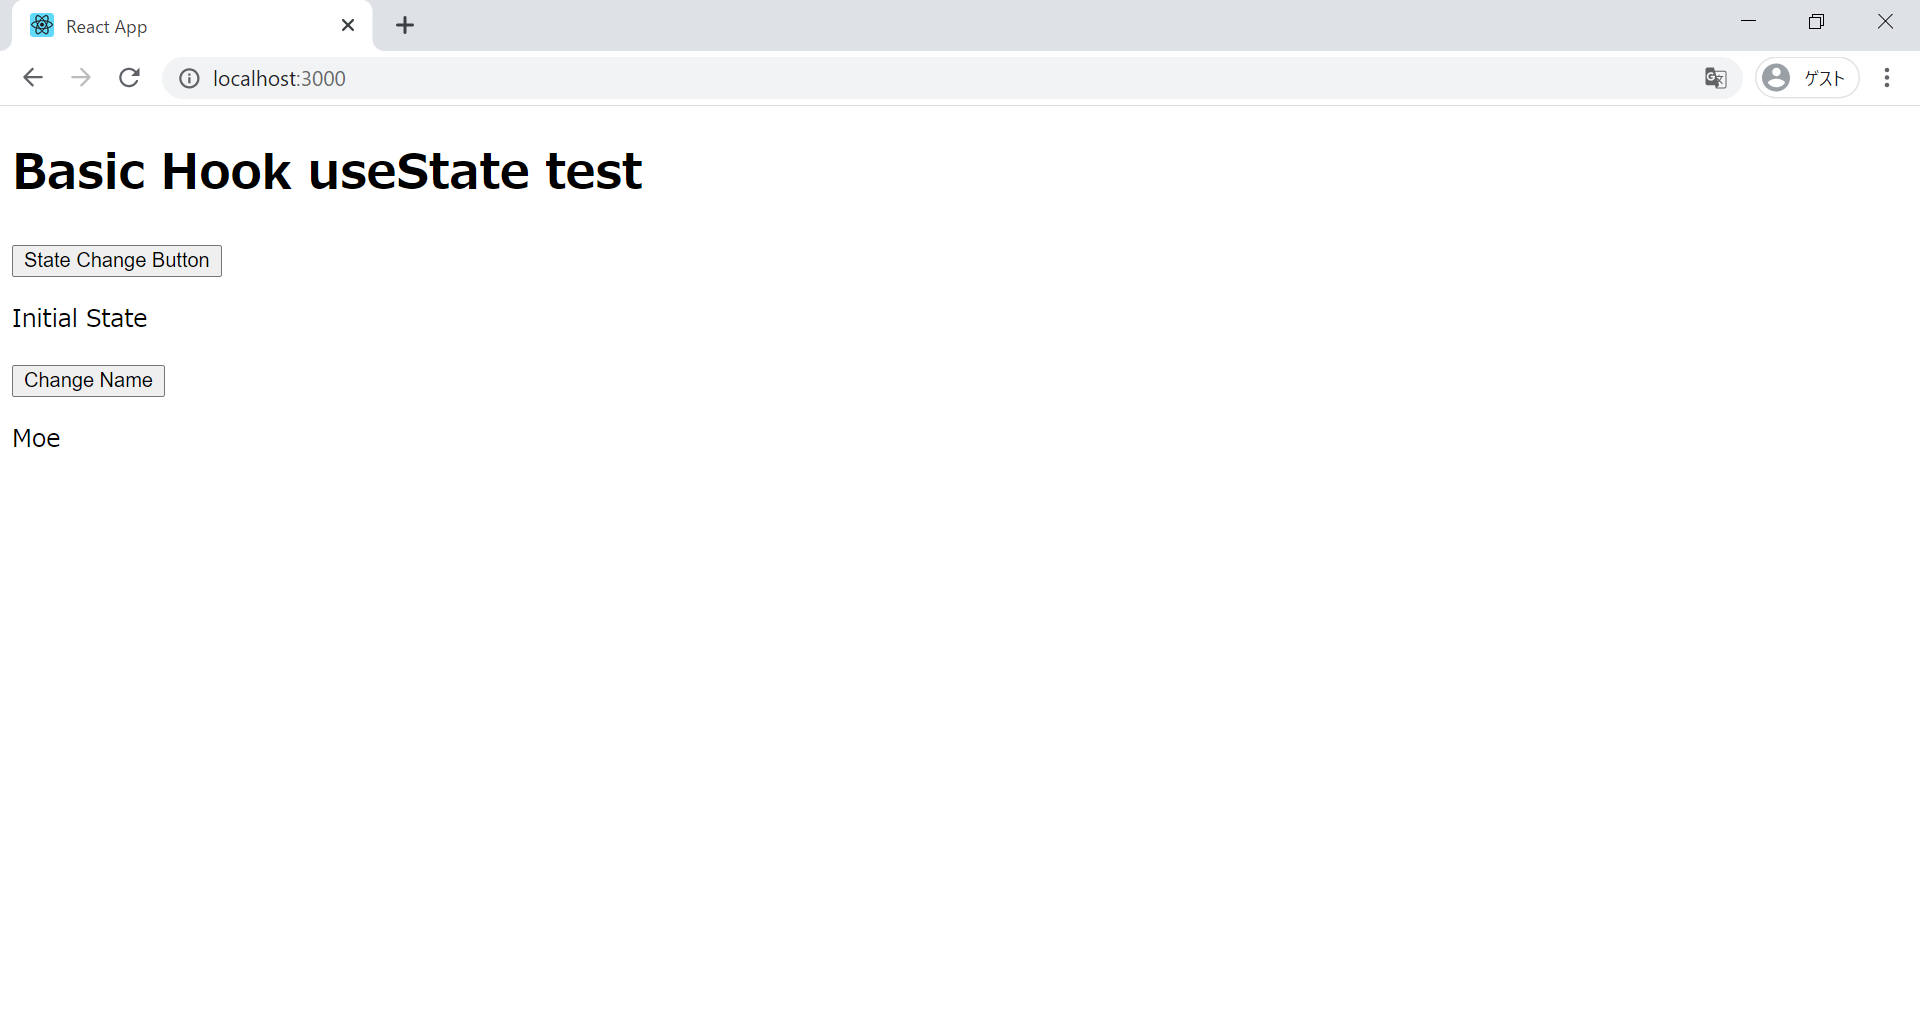
3. Thêm Component「Sample.js」vào thư mục「src/components」
// ./src/components/Sample.js
import React, { useState } from 'react';

const Sample = (props) => {
    const [state, setState] = useState("Initial State")
    const changeState = () => {
        setState("Initial State Changed")
    }
    const changeNameToSteve = () => {
        props.changeName()
    }

    return (
        <div>
            <button onClick={changeState}>
                State Change Button
            </button>
            <p>{state}</p>
            <button onClick={changeNameToSteve}>
                Change Name
            </button>
            <p>{props.name}</p>
        </div>
    )
}

export default Sample;
4. Thay đổi nội dung của「App.js」
// ./src/App.js
import React, { useState } from 'react';
import Sample from './components/Sample';

const App = () => {
    const [name, setName] = useState("Moe")

    const changeName = () => {
        setName("Steve")
    }

    return (
        <div className="App">
            <h1> Basic Hook useState test</h1>
            <Sample name={name} changeName={changeName} />
        </div>
    );
}

export default App;
5. Start React App
yarn start

6. Thêm Enzyme vào project
- Vai trò của Enzyme: Unit Test và Integration Test
yarn add --dev enzyme enzyme-to-json enzyme-adapter-react-16- Tham khảo thêm Enzyme: enzyme-home-page
6.1 Thêm Component 「Sample.test.js」vào thư mục「src/components/test/」
// ./src/components/__test__/Sample.test.js
import React from 'react';
import App from './../../App';
import Sample from '../Sample';
import Enzyme, { shallow, render, mount } from 'enzyme';
import Adapter from 'enzyme-adapter-react-16';

Enzyme.configure({ adapter: new Adapter() });

describe('Sample:', () => {
    // unit test
    test('1. Text in state is changed when button clicked', () => {
        const wrapper = shallow(<Sample />);
        expect(wrapper.find('p').at(0).text()).toBe("Initial State");
        wrapper.find('button').at(0).simulate('click');
        expect(wrapper.find('p').at(0).text()).toBe("Initial State Changed");
    });

    // integration test
    test('2. Button click changes props', () => {
        const wrapper = mount(<App><Sample /></App>);
        expect(wrapper.find('p').at(1).text()).toBe("Moe");
        wrapper.find('button').at(1).simulate('click');
        expect(wrapper.find('p').at(1).text()).toBe("Steve");
    });
})
7. Thêm jest vào project
yarn add --dev @babel/core @babel/preset-env @babel/preset-react babel-jest jest jest-junit react-test-renderer- Tham khảo thêm Jest: Jest-home-page
8 Tiến hành config jest
8.1 Thêm 「babel.config.js」
// ./babel.config.js
module.exports = {
    presets: ['@babel/preset-env', '@babel/preset-react']
}
8.2 Thêm 「jest.config.js」
// ./jest.config.js
module.exports = {
    verbose: true,
    testRegex: "((\\.|/*.)(test))\\.js?$",
    reporters: [
        "default",
        ["jest-junit", { suiteName: "jest tests" }]
    ]
}
8.3 Thay đổi scripts trong「package.json」
"scripts": {
    "test": "jest"
}
8.4 Thêm snapshot renders with jest
// ./src/App.test.js
import React from 'react';
import TestRenderer from 'react-test-renderer';

import App from './App';

describe('App:', () => {
    test('snapshot renders', () => {
        const component = TestRenderer.create(<App />);
        let tree = component.toJSON();
        expect(tree).toMatchSnapshot();
    });
});
9. Run test
yarn test-
Output:
yarn run v1.22.5
$ jest
 PASS  src/App.test.js
  App:
    ✓ snapshot renders (17 ms)

 PASS  src/components/__test__/Sample.test.js
  Sample:
    ✓ 1. Text in state is changed when button clicked (11 ms)
    ✓ 2. Button click changes props (44 ms)

Test Suites: 2 passed, 2 total
Tests:       3 passed, 3 total
Snapshots:   1 passed, 1 total
Time:        2.728 s
Ran all test suites.
Done in 4.32s.
10 Thêm Coverage Report with jest
yarn test --coverage
11 Thêm Option auto update render snapshot
-
yarn test --coverage -u -
Output của automation test:
----------------|---------|----------|---------|---------|------------------- File | % Stmts | % Branch | % Funcs | % Lines | Uncovered Line #s ----------------|---------|----------|---------|---------|------------------- All files | 100 | 100 | 100 | 100 | src | 100 | 100 | 100 | 100 | App.js | 100 | 100 | 100 | 100 | src/components | 100 | 100 | 100 | 100 | TestHook.js | 100 | 100 | 100 | 100 | ----------------|---------|----------|---------|---------|------------------- -
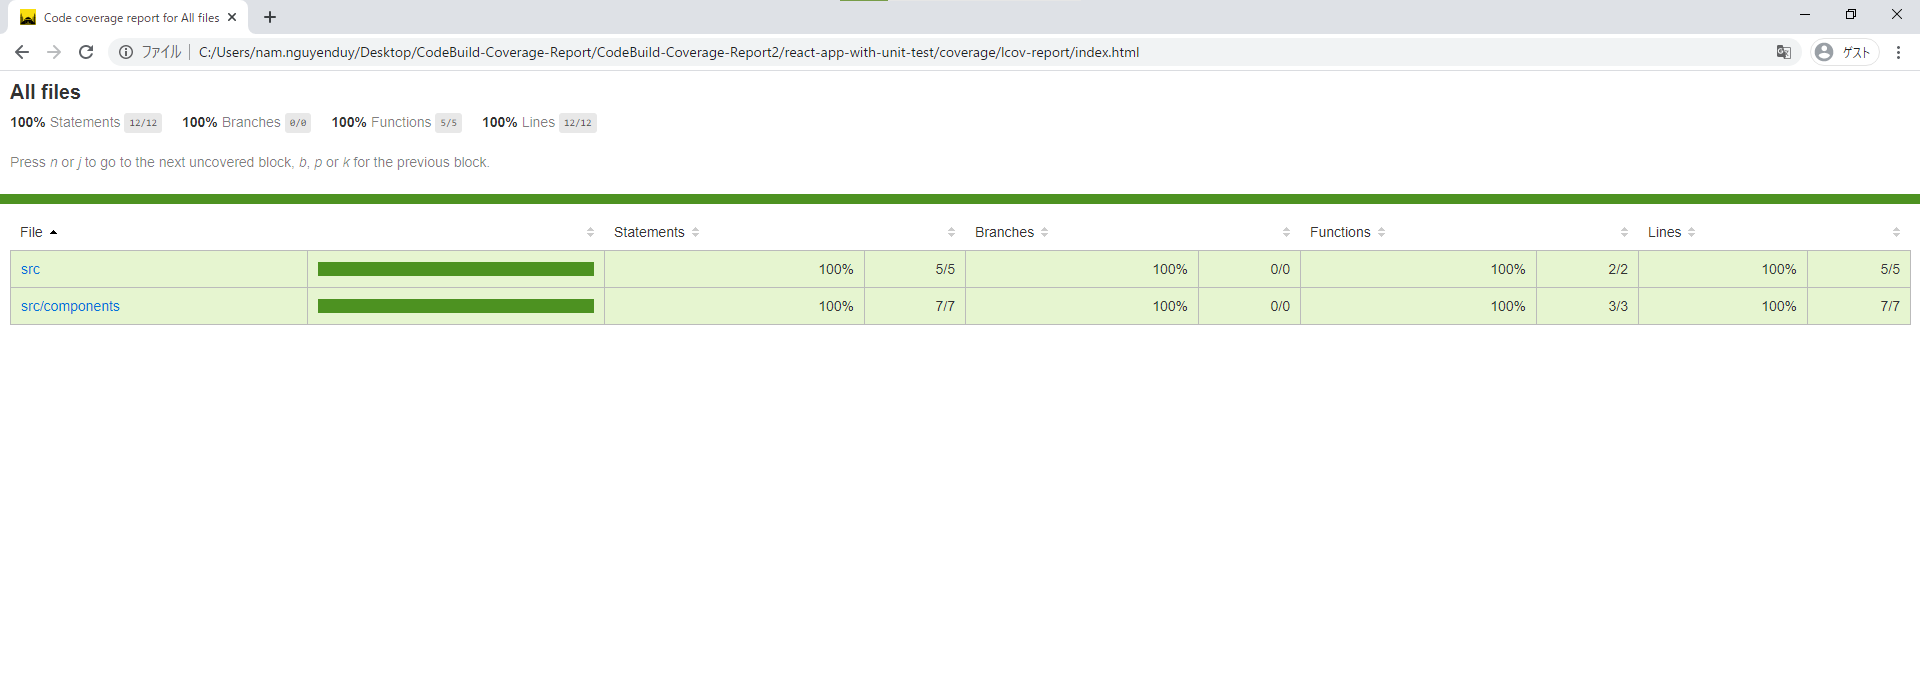
Các bạn có thấy độ bao phủ đã đạt được 100% cho tất cả các function và các lines -> thật là tuyệt vời
12. Lời kết:
- Đến đây bạn có thể xem Coverage Report trong đường dẫn: ./coverage/lcov-report/index.html rồi.

- Bạn có thể thêm những components khác và chạy test thử sẽ thấy nếu mình không viết unit test hay integration test cẩn thận, kết quả sẽ không được 100% được
- Phạm vi bài viết này mình không đề cập đến yarn start, vì khi bạn tích hợp JEST vào ReactJS bạn sẽ cần deploy yarn thông qua webpack plugin
- Ngoài đường dẫn ./coverage/lcov-report/index.html bạn có thể sử dụng ./coverage/clover.xml để tích hợp với AWS Codebuild hay Jenkin để hiển thị Coverage report
- Trong những phần sau, mình sẽ hướng dẫn các bạn sao để tích hợp automation test với AWS Codebuild và kết hợp Test report sao cho hiệu quả nhé!






Leave a Reply